
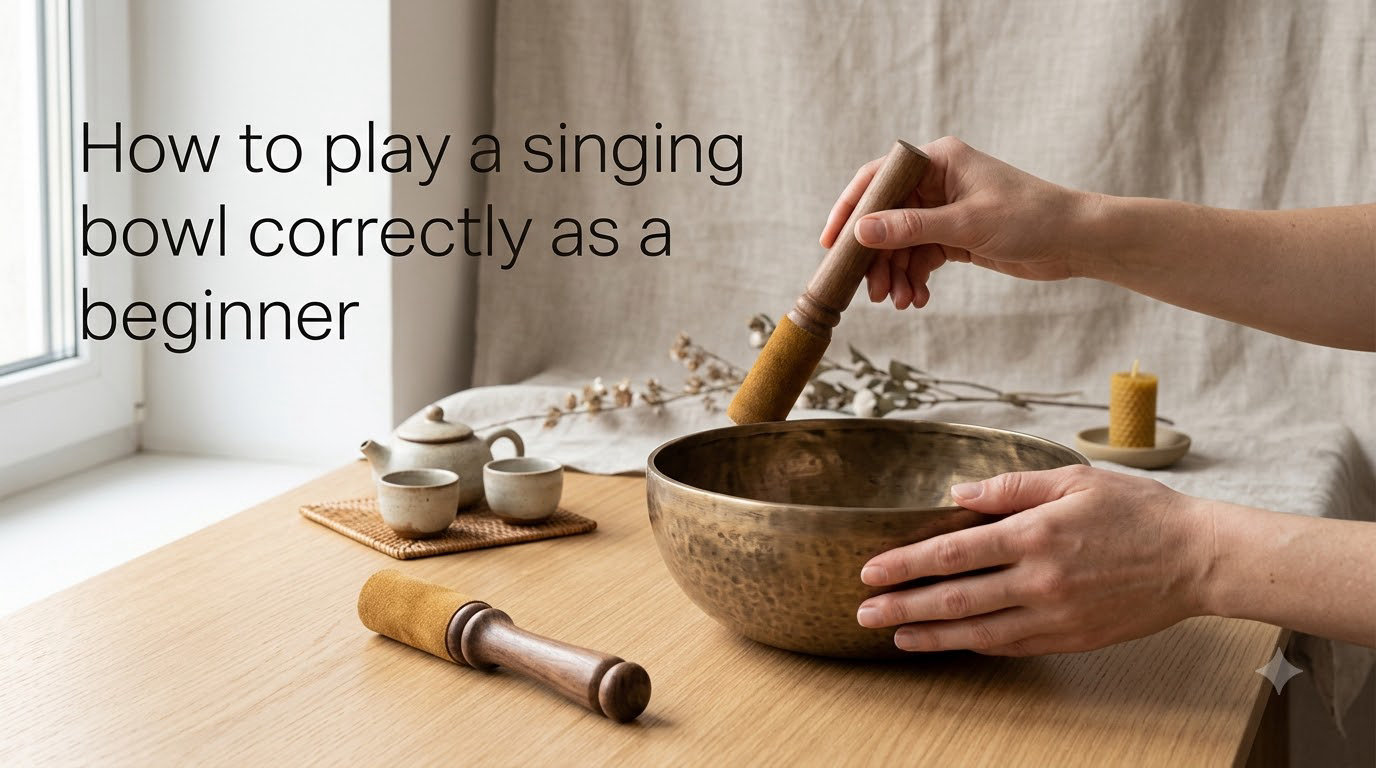
The first time I picked up a singing bowl, I was convinced I had been sold a dud. I struck the side with the mallet, heard a dull clunk, and watched my Tibetan bowl sit there stubbornly silent. If that sounds familiar, you are in good company — that initial frustration is something nearly every player goes through.
Learning how to play a singing bowl correctly as a beginner is not about talent or musical ability. It is about technique. The two core methods — striking and rimming — are simple once someone breaks them down for you. The problem is that most beginners skip the fundamentals and jump straight to chasing that beautiful, sustained ringing tone, then give up when it does not happen on the first or second attempt.
In this guide, I will walk you through everything I have learned from years of practice and from talking with other singing bowl enthusiasts. We will cover both core techniques with clear, numbered steps for each. You will learn how to hold the bowl, how to grip the mallet, how much pressure to apply, and exactly what to do when things go wrong.
I will also share the common mistakes that trip up almost every beginner, a troubleshooting guide for when your bowl refuses to sing, breathing techniques to sync with your playing, and a few advanced methods you can try once you have built confidence.
By the end, you will have a complete roadmap for getting beautiful, sustained tones from your singing bowl. No prior musical experience is needed — just patience and a willingness to practice for a few minutes each day.
Let us start with the basics.
Table of Contents
What Is a Singing Bowl and How Does It Work?
A singing bowl is a type of standing bell that produces rich, harmonic tones when struck or rubbed with a mallet. Unlike regular bells that hang and swing, singing bowls rest upright on a flat surface or in the palm of your hand. When played correctly, they produce a complex blend of frequencies — a fundamental note plus multiple overtones — that create that signature sustained, singing sound.
The two most common types are Tibetan (also called Himalayan) bowls, made from metal alloys, and crystal singing bowls, made from pure quartz. Tibetan bowls are the traditional choice and are generally easier for beginners because they respond well to both striking and rimming techniques. Crystal bowls produce incredibly pure tones but can be more temperamental, so I recommend starting with a metal bowl if you have the option.
The science behind the sound is called acoustic entrainment. When you strike or rim the bowl, the metal or crystal vibrates at specific frequencies. These vibrations travel through the air as sound waves and can gently influence your brainwave patterns, which is why singing bowls feel so calming during meditation or sound therapy sessions.
Each bowl has its own unique voice. The size, thickness, shape, and material all affect the pitch and character of the sound. A larger bowl tends to produce deeper, longer-lasting tones, while a smaller bowl gives you higher, brighter notes. No two bowls sound exactly alike, even when they come from the same maker.
You do not need to understand the physics to enjoy playing. But knowing that every bowl has its own personality helps explain why your technique may need to adapt to each individual bowl. What works perfectly on one bowl might need slight adjustments on another.
How to Hold a Singing Bowl and Mallet Correctly?
Before you can make a single sound, you need to know how to hold both the bowl and the mallet. This is the step most beginners rush through, and it is also the step that causes the most frustration later. Get the hold right, and the rest becomes much easier.
Holding the Bowl
There are two main ways to hold a singing bowl, and the choice depends on what you are trying to do.
The first method is resting the bowl on a cushion or flat surface. This is the easiest option for beginners. Place the bowl on a small, felt-padded ring or a folded cloth on a sturdy table. The cushion prevents the bowl from slipping and stops the vibrations from being absorbed by the surface. This setup gives you two free hands, which is ideal when you are first learning the rimming technique.
The second method is holding the bowl in the palm of your non-dominant hand. Sit comfortably, rest the bowl flat on your open palm with your fingers relaxed and slightly spread. The key here is contact — your palm should touch the bottom of the bowl, but your fingers should not grip the sides. If your fingers touch the bowl’s walls, they will dampen the vibrations and kill the sound.
I made this mistake for weeks when I started. I would cup the bowl like a drinking glass, and then wonder why the tone died almost instantly. Once I flattened my hand and let the bowl rest on my palm instead, the sound opened right up.
Holding the Mallet
The way you hold the mallet changes depending on which technique you are using, but the basic grip is the same. Hold the mallet like a thick pen — grip it near the top with your thumb, index finger, and middle finger, and let the padded end hang down. The wooden or leather-covered end is what makes contact with the bowl.
Keep your grip firm enough to control the mallet but relaxed enough that your wrist and arm can move freely. A death grip will make your movements stiff and jerky, which is the opposite of what you want. The mallet needs to glide smoothly across the rim.
Your posture matters too. Sit up straight with your shoulders relaxed and your feet flat on the floor. Tension anywhere in your body translates into tension in your playing. Many experienced players take a few deep breaths before they begin, just to settle their body and mind.
One more thing: keep your free hand away from the bowl while you play. It is tempting to steady the bowl with your other hand, especially when it is resting on your palm. Do not do it. Any contact with the sides will absorb the vibrations and cut the sound short.
How to Play a Singing Bowl Correctly as a Beginner: Two Core Techniques
There are two foundational ways to play a singing bowl — striking and rimming. Everything else you will ever learn is a variation or extension of these two methods. Master them, and the rest follows naturally.
Striking is the simpler of the two. You strike the side of the bowl to produce a clear, bell-like tone that rings out and gradually fades. Rimming is more advanced but produces the sustained, singing tone that most people associate with singing bowls. You run the mallet around the outer rim of the bowl in a continuous motion to keep the sound going indefinitely.
Most teachers recommend starting with striking to get a feel for your bowl’s voice, then moving on to rimming once you are comfortable. Let me walk you through each technique step by step.
The Striking Technique
Striking is where every beginner should start. It teaches you what your bowl sounds like, how it responds to different amounts of force, and where the sweet spot is on the bowl’s wall. Here is how to do it correctly.
Step 1: Position the bowl. Rest your singing bowl on a cushion or flat surface in front of you. If you prefer to hold it, place it on your open palm with relaxed fingers. Make sure the bowl is stable and will not slide around when struck.
Step 2: Hold the mallet correctly. Grip the mallet by the handle end, with the padded or wooden striking surface pointing down. Hold it the way you would hold a drumstick — firm but not tight, with your wrist loose and ready to move.
Step 3: Find the sweet spot. Look at the outer wall of the bowl. The ideal striking point is on the side, about midway between the rim and the base. Do not strike the very top rim or the bottom — the middle of the wall produces the fullest, most resonant tone.
Step 4: Strike with a quick, firm tap. Bring the mallet to the bowl’s wall in one smooth motion and strike lightly. Think of it as a tap, not a hit. You want just enough force to make the bowl vibrate. If the sound is harsh or metallic, you are hitting too hard. If there is barely any sound, add a little more force.
Step 5: Pull the mallet away immediately. This is the step most beginners get wrong. Do not let the mallet rest against the bowl after striking. The moment contact is made, lift the mallet away. Leaving it touching the bowl will dampen the vibration and kill the ring.
Step 6: Listen and let it ring. A well-struck bowl will produce a clear tone that sustains for several seconds. The sound should feel smooth and round, not sharp or jarring. Notice how the tone changes as it fades — you will hear the fundamental note first, then the overtones emerging as the volume drops.
Practice striking from different angles and with different amounts of force. Your goal is to find the exact spot and pressure that produces the best tone from your particular bowl. Every bowl is different, so spend a few minutes experimenting.
One common question I hear from beginners is whether to strike from the outside in or from the side. I recommend approaching the bowl from the side, almost as if you are knocking gently on a door. This produces a cleaner tone than coming down from above, which tends to create a harsher, more metallic sound.
The Rimming Technique
Rimming is the technique that produces the sustained, singing tone most people think of when they imagine a singing bowl in action. Instead of striking once and letting the sound fade, you keep the mallet in contact with the bowl’s rim and circle continuously. The friction between the mallet and the rim keeps the bowl vibrating, so the sound builds and sustains for as long as you keep going.
This technique takes more practice than striking, but it is deeply rewarding once you get the hang of it. Here is the step-by-step method.
Step 1: Position the bowl. You can rim a bowl resting on a cushion or held in your palm. If you are holding it, make sure your palm supports the base without your fingers touching the sides. Beginners often find it easier to start with the bowl on a cushion so both hands are free.
Step 2: Hold the mallet vertically. Grip the mallet with the padded end pointing down. The mallet should be roughly vertical — perpendicular to the bowl’s rim. Some players tilt it slightly, but starting with a straight up-and-down position is easiest for beginners.
Step 3: Strike first to start the vibration. Give the bowl a gentle strike on the side to get it vibrating. This is not strictly necessary, but it makes rimming much easier for beginners. The pre-existing vibration reduces the friction you need to overcome when you start circling the rim.
Step 4: Place the mallet on the outer rim. Press the padded end of the mallet gently against the outside edge of the bowl’s rim. The contact point should be on the outer wall, just below the top edge. Apply light but consistent pressure — think of pressing firmly enough to create friction, but not so hard that the mallet digs in.
Step 5: Circle the rim clockwise. Begin moving the mallet around the outer rim in a slow, steady clockwise motion. Use your full arm to circle, not just your wrist. Your elbow should move as your hand traces the arc around the bowl. This full-arm movement keeps the motion smooth and maintains even pressure.
Step 6: Maintain even pressure and speed. This is the most important step. Keep the pressure steady and the speed consistent as you circle. Too much pressure will cause the mallet to stutter and produce a rattling sound. Too little pressure and the mallet will skip off the rim without building any sound. Aim for a slow, deliberate pace — about one full circle every two to three seconds.
Step 7: Let the sound build. As you continue circling, the tone will grow louder and richer. You will hear the fundamental note first, and then the overtones will emerge. Some players describe this as the bowl “waking up.” Keep circling steadily, and the sound will sustain and grow.
Step 8: Stop or transition smoothly. When you are ready to stop, simply lift the mallet away from the rim. The bowl will continue ringing for several seconds as the vibrations fade naturally. Alternatively, you can transition back to a gentle strike or move to another bowl.
The biggest challenge with rimming is finding the right combination of pressure, speed, and mallet angle. It usually takes several attempts before everything clicks. Do not get discouraged if your first few tries produce nothing but squeaks and rattles. That is completely normal.
One tip that helped me enormously: pay attention to the texture of your mallet. A brand-new mallet has a smooth surface that slides too easily over the rim. You need to break it in first, which brings us to the next section.
Breaking In Your Mallet: Why It Matters
If your mallet is brand new, it probably will not produce good sound right away. This is one of the most common reasons beginners think their bowl is defective. The padded end of a new mallet has a smooth, almost slick surface. The rim needs friction to vibrate, and a smooth mallet just slides over the metal without creating enough grip.
Breaking in a mallet means roughening up the surface so it grabs the rim properly. The process is simple. Take your mallet and rub the padded end firmly against the rim of your bowl for about five to ten minutes before your first real playing session. You can also rub it against a piece of rough fabric or even a brick to speed things up.
You will know the mallet is ready when you can see tiny grooves and texture in the padding. The surface should look slightly worn and felt-like. Once broken in, the mallet will create much better friction and produce cleaner, louder tones from your bowl.
If you are using a wooden mallet for rimming, the break-in process is slightly different. The wood needs to develop micro-grooves from contact with the metal rim. Play for short sessions over several days, and the wood will naturally develop the texture it needs.
This step sounds small, but I have seen beginners struggle for weeks only to solve their problem instantly by breaking in the mallet properly. It is worth the ten minutes of effort.
Common Mistakes Beginners Make
After working with many new singing bowl players, I have noticed the same handful of mistakes coming up again and again. Recognizing these early will save you hours of frustration.
Using too much pressure. This is the number one mistake. Beginners think harder pressure equals more sound, but it works the opposite way. Too much pressure stops the mallet from gliding smoothly and produces a harsh rattling or chattering noise instead of a clean tone. Use light, consistent pressure — just enough to maintain contact with the rim.
Using too little pressure. The flip side is equally common. If your pressure is too light, the mallet will skip and stutter over the rim without building any vibration. You need enough contact to create friction. If you hear nothing at all, try pressing just slightly harder.
Moving the wrist instead of the full arm. Rimming requires full-arm movement. If you try to circle the bowl using only your wrist, your motion will be choppy and uneven. The pressure will fluctuate with every rotation, and the sound will cut in and out. Use your shoulder and elbow to trace a smooth circle around the bowl.
Circling too fast. Speed kills the rimming technique. Beginners tend to circle frantically, hoping that faster movement will produce more sound. It does not. Fast circling reduces contact time on each part of the rim and prevents the vibration from building. Aim for a slow, deliberate pace — about one full rotation every two to three seconds.
Touching the bowl with your free hand. I mentioned this earlier, but it deserves repeating because it happens so often. If the bowl is in your palm and your fingers curl up and touch the sides, the sound dies immediately. Keep your supporting hand flat and your fingers spread wide, touching only the base of the bowl.
Skipping the mallet break-in. A new mallet will not work well until it has been broken in. I covered this above, but too many beginners skip it and then blame themselves or the bowl. Take ten minutes to rough up the mallet surface before your first real session.
Using the wrong type of mallet. Different bowls respond better to different mallets. A large, heavy bowl may need a bigger mallet with a thick padded end. A small bowl might sing best with a thinner wooden striker. If your bowl is not responding, try a different mallet before assuming the bowl is the problem.
Giving up too soon. This is the mistake that costs people the most. Rimming a singing bowl takes practice. Most beginners need several sessions over a few days before they produce a consistent, sustained tone. If your first attempt does not work, take a break and try again tomorrow. You will get there.
Troubleshooting: Why Won’t My Singing Bowl Sing?
Even with good technique, things can go wrong. Here are the most common problems beginners encounter and how to fix each one.
Problem: The bowl makes a rattling or chattering sound instead of singing. This is almost always a pressure issue. You are pressing too hard, and the mallet is catching on the rim instead of gliding. Lighten your pressure significantly and try again. A rattling sound can also mean your mallet is not broken in yet, so check that first.
Problem: The bowl produces a tone but it fades quickly. If the sound starts but dies within a second or two, you are likely losing contact with the rim mid-circle, or your pressure is inconsistent. Slow down your circling speed and focus on maintaining steady, even pressure throughout each rotation. Also check that your free hand is not touching the bowl.
Problem: The bowl produces no sound at all during rimming. If you get complete silence, start by checking your mallet. Is it broken in? Is the padded end making full contact with the rim? Try increasing your pressure slightly and circling more slowly. If you still get nothing, try striking the bowl first to start a vibration, then immediately transition to rimming.
Problem: The sound is harsh or metallic. A harsh, clangy tone usually means you are striking too hard or rimming with too much pressure. The bowl’s wall may also be too thin for the mallet you are using. Try a softer mallet or a gentler touch.
Problem: The bowl sings on the cushion but not in my hand. This is a common issue for beginners. When you hold the bowl in your palm, your hand absorbs some of the vibrations, which can make rimming harder. The solution is to make sure only your palm is touching the base, not your fingers on the sides. Some bowls simply sing better on a cushion, and that is perfectly fine.
Problem: My crystal singing bowl stopped singing. Crystal bowls are more sensitive than metal bowls. Changes in temperature, humidity, or even dust on the rim can affect performance. Clean the rim with a soft cloth, check that your mallet is clean and properly textured, and make sure your pressure is light — crystal bowls need less pressure than metal bowls.
Problem: The vibrations feel overwhelming. Some people are highly sensitive to the vibrations produced by singing bowls, especially larger bowls held close to the body. If the sensation feels too intense, try placing the bowl on a surface instead of holding it, or switch to a smaller bowl. Start with short sessions of one to two minutes and gradually build your tolerance. There is nothing wrong with you — sensitivity to sound and vibration varies widely from person to person.
Problem: Nothing works and I am ready to give up. Take a deep breath. Go back to the basics. Break in your mallet, place the bowl on a cushion, strike it gently to start a vibration, and then try rimming with slow circles and light pressure. Most troubleshooting comes down to these four elements: mallet condition, bowl position, starting vibration, and pressure control.
Advanced Techniques to Try After You Master the Basics
Once you can consistently produce sustained tones with both striking and rimming, you can start exploring some of the more creative techniques. These are not necessary for beginners, but they add variety and depth to your practice once you are ready.
The Water Technique. This is one of the most visually striking singing bowl effects. Fill your bowl with a small amount of water — about one-quarter full. Strike or rim the bowl as usual. The vibrations will create beautiful patterns on the water’s surface, and if you play hard enough, the water will actually dance and splash. The sound also changes, becoming softer and more bell-like. Be careful not to overfill, and never use this technique with crystal bowls, as water can seep into tiny cracks.
The Wah-Wah Technique. After rimming the bowl to produce a strong, sustained tone, lift the bowl carefully and hold it close to your open mouth. Without touching the bowl to your lips, open and close your mouth as if saying “wah-wah.” The shape of your mouth acts as a resonance chamber, and the sound will shift and warp in fascinating ways. This technique takes some practice but produces an otherworldly effect that is hard to replicate any other way.
Playing Multiple Bowls. If you have two or more bowls, you can create layered harmonies by striking them in sequence or playing them in a sound bath arrangement. Start by striking each bowl individually to learn its fundamental note, then experiment with combinations. Some bowls produce beautiful harmonies together, while others clash. The key is to let each bowl’s tone ring fully before striking the next.
Isolating Overtones. Every singing bowl produces a fundamental note plus several overtones — higher frequencies that sit on top of the main tone. With practice, you can learn to emphasize specific overtones by adjusting your rimming speed and pressure. Faster circling tends to bring out higher overtones, while slower circling emphasizes the fundamental note. This gives you a surprising amount of tonal control from a single bowl.
Cup Gong Technique. Instead of striking the outer wall, you can strike the bowl from inside. Hold the mallet vertically and tap the inner wall of the bowl with the padded end. This produces a softer, more muted tone compared to an external strike. It is useful when you want a gentler sound for meditation or when playing in a quiet space.
None of these advanced techniques are required for a fulfilling singing bowl practice. They are simply tools to explore once you feel comfortable with the fundamentals. Do not rush into them — a clean, well-executed strike or sustained rim is beautiful on its own.
Beginner Practice Tips for Faster Progress
How you practice matters just as much as what you practice. Here are some tips I have gathered from experienced players and from my own experience that will help you improve faster and enjoy the process more.
Start with short sessions. When you first begin, aim for five to ten minutes of practice per session. This is enough time to try both techniques and build muscle memory without getting frustrated. Two short sessions per day are more effective than one long one, because your brain processes the new movements between sessions.
Give it at least a week. Most beginners can produce a basic strike on day one, but consistent rimming usually takes three to seven days of regular practice. If you have been trying for a week and still cannot get a sustained tone, revisit the troubleshooting section and check each element — mallet condition, pressure, speed, and bowl position.
Synchronize your breathing. This is a technique that very few guides cover, but it makes a real difference. Before you start playing, take three slow, deep breaths to center yourself. As you rim the bowl, try to sync your circling motion with your breath — one full circle on each inhale, one on each exhale. This creates a meditative rhythm that deepens the experience and also helps you maintain a slow, steady pace.
Practice at the right time. Many players find that early morning or late evening works best, when the house is quiet and they feel calm. Singing bowls respond to your energy — if you are tense and rushed, your playing will sound tense and rushed. Choose a time when you can relax and focus.
Be mindful of others. Singing bowls can be loud, especially larger ones. If you live with others or in an apartment, practice during reasonable hours and consider using a smaller bowl or placing a soft cloth underneath to absorb some of the vibration. You can also practice in a room with carpet and curtains, which absorb sound better than hard surfaces.
Keep a simple daily routine. You do not need an elaborate ritual. A simple routine might look like this: sit comfortably, take three deep breaths, strike the bowl once and listen to the full decay of the tone, then practice rimming for two to three minutes. That is it. Consistency matters far more than duration.
Notice what you feel emotionally. Singing bowls can stir up emotions. Some people feel deeply relaxed, others feel a sense of clarity, and some even feel emotional release or mild anxiety, especially in the first few sessions. This is normal. The vibrations are doing their work. If you feel overwhelmed, stop, take a break, and try again later with a shorter session.
Record yourself. It is hard to judge your own sound while you are focused on technique. Use your phone to record a short video of your practice session. Listen back and you will immediately hear whether your tone is clean and sustained or if there are issues you missed in the moment.
Experiment with different bowls. If you have access to more than one bowl, spend time with each. You will find that different bowls respond to slightly different techniques. Learning to adapt your grip, pressure, and speed to different bowls will make you a more versatile player overall.
Remember that the goal is not perfection. It is connection — with the sound, with the vibration, and with the moment. The most beautiful singing bowl sessions come from players who are relaxed and present, not from those who are stressed about getting the technique exactly right.
FAQs
Is there a wrong way to play singing bowls?
Yes. Pressing too hard on the rim, circling too fast, touching the bowl sides with your fingers, and using an unbroken-in mallet are the most common mistakes. These produce rattling sounds, kill the vibration, or prevent the bowl from singing at all. The correct way uses light, even pressure with slow, full-arm circular motion.
How to use a singing bowl for beginners?
Start by resting the bowl on a cushion. Hold the mallet like a thick pen, then gently strike the side of the bowl midway between the rim and base. Listen to the tone ring and fade. Once comfortable with striking, try rimming: press the mallet lightly against the outer rim and circle slowly clockwise using your full arm. Practice five to ten minutes daily.
How do I know which chakra my singing bowl is for?
Singing bowls are often associated with chakras based on their fundamental note. C notes link to the root chakra, D to the sacral, E to the solar plexus, F to the heart, G to the throat, A to the third eye, and B to the crown. You can use a tuner app to identify your bowl’s note. However, many practitioners believe all bowls benefit the entire body regardless of pitch.
Is it hard to learn to play singing bowls?
No, singing bowls are beginner-friendly and require no musical background. Striking is simple and works on the first try for most people. Rimming takes more practice, usually three to seven days of short daily sessions, but the technique itself is straightforward once you find the right pressure, speed, and mallet angle.
Why can’t I get my singing bowl to work?
The most common reasons are an unbroken-in mallet, too much or too little pressure, circling too fast, or your fingers touching the bowl sides. Break in your mallet first, place the bowl on a cushion, strike it gently to start a vibration, then rim with slow circles and light, even pressure. Most issues resolve once these basics are corrected.
What not to do with crystal singing bowls?
Do not overfill crystal bowls with water, do not expose them to sudden temperature changes, do not use excessive pressure when rimming, and do not grip the sides with your fingers. Crystal bowls are more fragile than metal bowls and can crack if mishandled. Clean the rim regularly and store them padded to prevent chips.
Why do singing bowls irritate me?
Some people are sensitive to the frequencies and vibrations singing bowls produce, which can cause mild irritation, anxiety, or sensory overload. This is a normal individual response. Try using a smaller bowl, placing it on a surface instead of holding it, shortening sessions to one or two minutes, or lowering the volume with a gentler strike.
Wrapping Up
Learning how to play a singing bowl correctly as a beginner comes down to two things: technique and patience. The striking method gives you an immediate, satisfying tone from day one. The rimming method takes a few days of practice but rewards you with the sustained, singing sound that makes these instruments so special.
Remember the fundamentals. Break in your mallet before anything else. Hold the bowl on your open palm or a cushion without letting your fingers touch the sides. Strike gently, lift the mallet away immediately, and for rimming, use slow clockwise circles with light, even pressure and your full arm.
Start with five to ten minutes of practice each day, sync your breathing with your motion, and give yourself at least a week before judging your progress. Every bowl has its own voice, and learning to bring it out is a quiet, rewarding process that deepens over time.
Pick up your bowl, take a deep breath, and begin. The sound is already in there waiting for you.