
The ZWO ASI183MC Pro is the best overall pick for most people shopping for the best cooled astronomy cameras for deep sky imaging, because it is the only body in this group with a large enough owner base to have its quirks documented honestly. A 20.1MP 4/3 inch back-illuminated sensor, 2.4 micron pixels, TEC cooling rated 40C to 45C below ambient and USB 3.0 readout at 19 fps put it in the middle of the range where it earns its place, and it works with the guide scopes we covered in our astronomy equipment guides.
What a cooled astronomy camera actually is, matters more than any spec sheet. It is a purpose-built low-light CMOS imaging camera whose thermoelectric cooler holds the sensor tens of degrees below the surrounding air. Dark current falls steeply with temperature, so a cooled sensor produces clean multi-minute exposures of faint nebulae instead of the glowing, noisy frames a DSLR or mirrorless body gives you at the same exposure length.
We compared six cooled CMOS cameras across ZWO and SVBONY, normalising them on the same columns: sensor format, resolution, pixel pitch, peak quantum efficiency, full well capacity, read noise behaviour, cooling delta below ambient, USB interface and buffer size. Ratings and review counts come straight from the owner feedback attached to each listing, and we did not rank anything on price.
One thing needs saying up front. Every camera here is a one-shot colour model. There is no monochrome option in this lineup, which means no filter wheel, no per-filter focus checks and no LRGB schedule to manage. That is a deliberate trade. If you are starting out or your clear nights are limited, the simplicity buys you more usable data than the theoretical efficiency of a mono rig. We explain the reasoning properly in the buying guide further down.
Read the picks below in order if you want a decision made for you, or jump to the guide sections if you would rather understand the trade first.
Table of Contents
Top 3 Best Cooled Astronomy Cameras for Deep Sky Imaging in 2026
These are the three we’d put in front of someone who asked us to choose one camera today. The first has the widest field of view in the group, the second has the best published noise specification at the entry tier, and the third has the largest sensor and highest rating here.
ZWO ASI183MC Pro
- 20.1MP 4/3 inch sensor
- 2.4 micron pixels
- TEC cooling 40C-45C below ambient
- 19 fps over USB 3.0

SVBONY SV405CC
- IMX294 4/3 inch BSI sensor
- 63ke- full well capacity
- TEC cooling 30C below ambient
- 19 fps RAW8

ZWO ASI2600MC Pro
- IMX571 APS-C sensor at 26MP
- 16-bit ADC for 14 stops of range
- 0e- readout noise
- 80% peak QE
Every Pick at a Glance (October 2026)
All six cameras in the same normalised columns. Read the sensor size column against your own optical train first, because a bigger sensor you cannot fill is wasted money.
| Product | Specifications | Action |
|---|---|---|
| ZWO ASI183MC Pro |
|
Check Latest Price |
| SVBONY SV405CC |
|
Check Latest Price |
| ZWO ASI2600MC Pro |
|
Check Latest Price |
 ZWO ASI585MC Pro ZWO ASI585MC Pro |
|
Check Latest Price |
 SVBONY SC571CC SVBONY SC571CC |
|
Check Latest Price |
 SVBONY SV605CC Kit SVBONY SV605CC Kit |
|
Check Latest Price |
1. ZWO ASI183MC Pro – The Proven General-Purpose Cooled OSC
ZWO ASI183MC Pro 20.18 MP CMOS Color Astronomy Camera with USB 3.0 # ASI183MC-P
20.1MP 4/3 inch sensor
2.4 micron pixels
19 fps over USB 3.0
Cooling 40C-45C below ambient
410 g
Pros
- Large 20.1MP 4/3 inch sensor captures fine nebula and galaxy detail
- TEC cooling supports low-noise long exposures on faint targets
- 19 fps USB 3.0 readout with 256MB DDR3 buffer
- Includes 1.25 inch and 2 inch focuser adapters
- Works with the ASIAIR Plus controller
Cons
- Amp glow needs calibrating out with regular darks
- TEC cooler needs a separate 12V power supply not included
- Older sensor design than newer models in the range
- Can be hard to reach critical focus by hand
The ASI183MC Pro has been in production long enough that almost every question about it has an answer somewhere. That is worth more to a first-time buyer than a marginally better spec sheet on a camera released last year with two ratings attached to it. Owner feedback on this listing spans a lot of optical trains, from a small RedCat 51 to an 8 inch SCT, which tells you something useful about how forgiving the camera is.
The sensor is a 20.1MP 4/3 inch CMOS part reading out at 5496 by 3672 with 2.4 micron pixels. That combination gives you a field of view wide enough to frame most large nebulae without a reducer, and the pixel pitch is small enough that a medium focal length refractor lands in the useful sampling range rather than oversampling badly.
Cooling is rated at 40C to 45C below ambient, which is a deeper delta than anything else in this group. In practice that means dark frames stay clean through long sub-exposures even on a warm night, which is exactly the situation most imagers in built-up areas will actually face.
The body is a compact red anodised CNC aluminium cube weighing 410 g, so it will not load a mid-weight mount awkwardly. It ships with a 1.25 inch T-threaded nosepiece and a 2 inch adapter, meaning it will fit either focuser style without a purchase.
Readout runs at up to 19 fps over USB 3.0 at maximum resolution, with a 256MB DDR3 buffer doing the smoothing that stops dropped frames on a laptop that is also running capture software. There is a separate USB 2.0 hub on the body for your guide camera, electronic focuser or filter wheel, which keeps accessory cabling off the main data line.
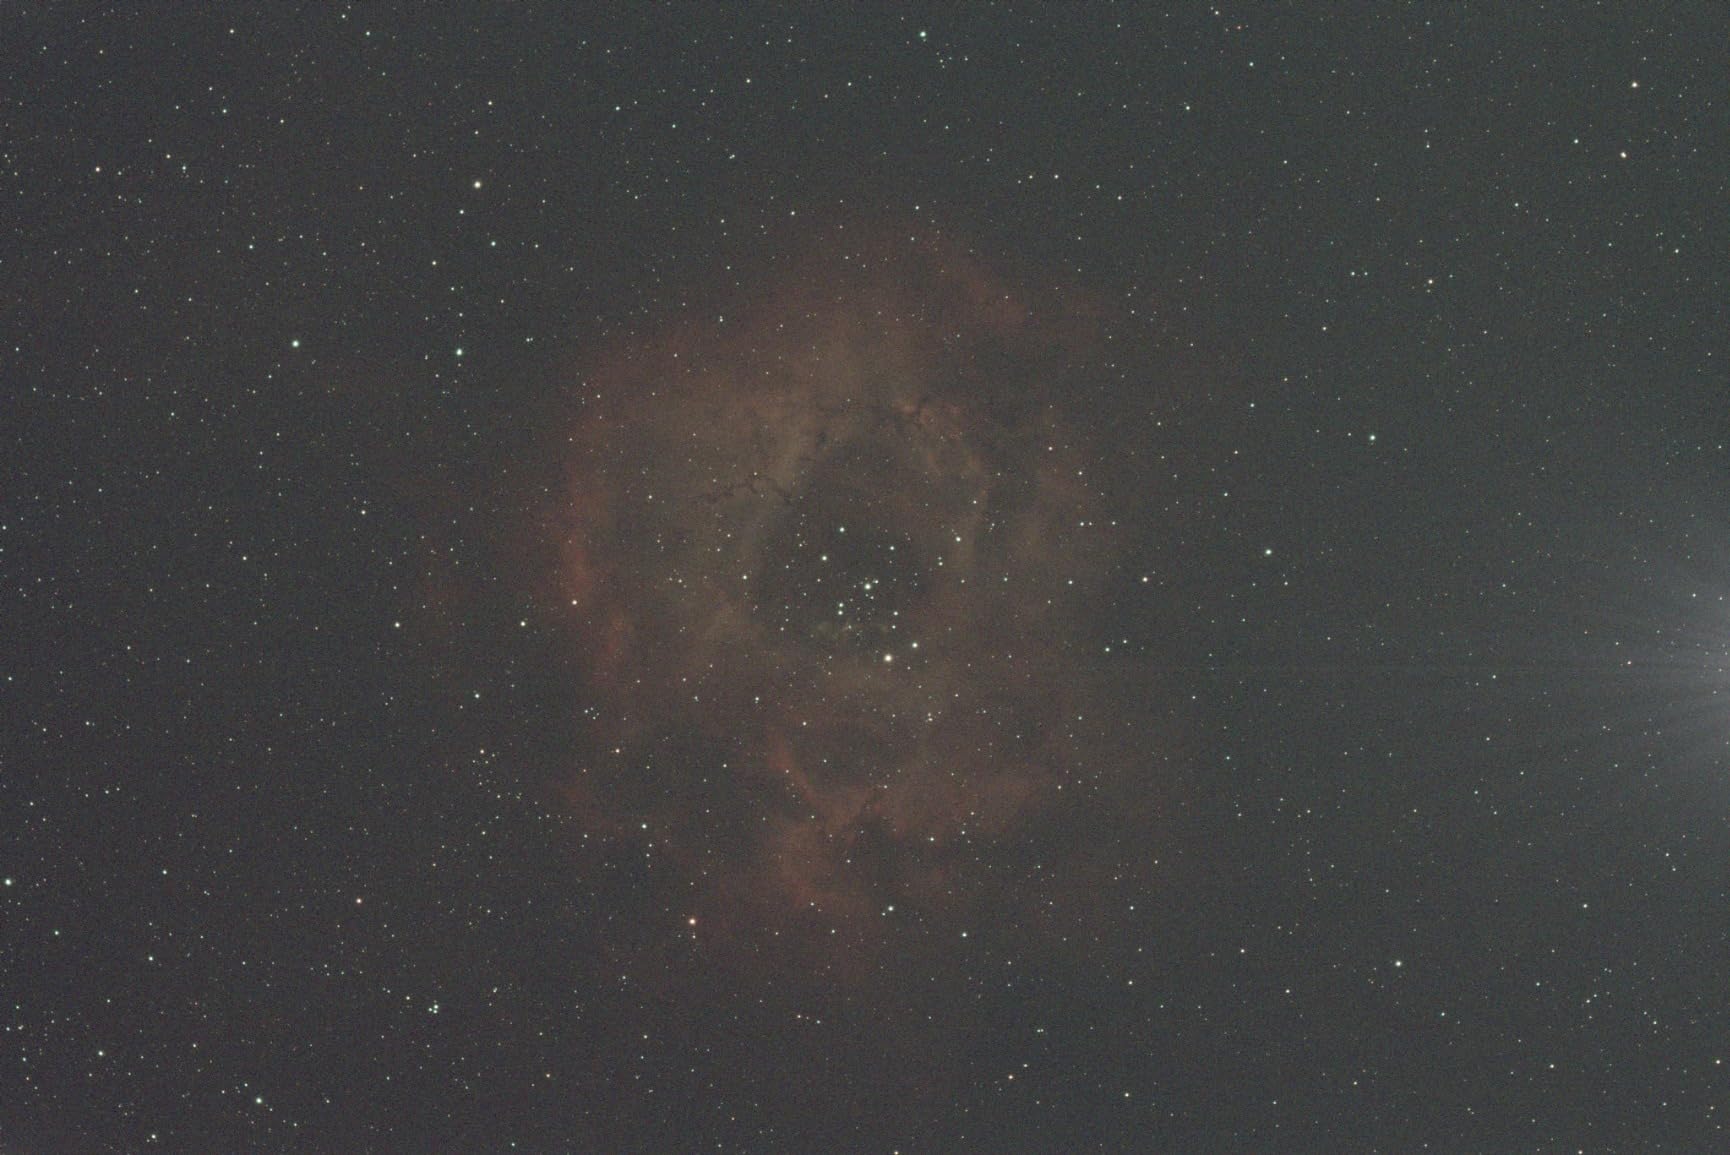
What you should check before the first clear night
The single most common complaint is amp glow, which shows up as a faint halo in the corners of long frames and needs nightly dark calibration to remove. It is a solvable problem rather than a fault, but it is work you have to schedule in from night one rather than discovering at the end of a project.
The second is power. The TEC cooler needs a separate 12V 3A supply and it is not in the box. If you are building from a controller that already provides 12V, check that your cable and connector match before the first session.
Where it fits badly
Focusing is manual and reviewers describe critical focus as genuinely fiddly on fast Newtonians and refractors, particularly with thin filter threads or an extension-heavy train. Budget for a Bahtinov mask or a focuser that takes a motorised unit, because a 20MP sensor at 2.4 micron pixels punishes sloppy focus far more than a small sensor does.
The sensor design also dates the body. If you are buying new and your optical train is APS-C capable or longer, the larger sensors further down this list will gather more signal per exposure and give you more room to crop.
2. SVBONY SV405CC – The Entry Pick With a Real Full Well Figure
SVBONY SV405CC Astrophotography Camera, Cooled Telescope Eyepiece IMX294
IMX294 4/3 inch BSI
4144x2822 at 4.63 micron pixels
63ke- full well
TEC cooling 30C below ambient
14-bit ADC
Pros
- Back-illuminated IMX294 with 63ke- full well gives wide dynamic range
- Two-stage TEC cooler cuts dark current during long exposures
- 19 fps RAW8 and 16 fps RAW16 over USB 3.0 with a 256MB DDRIII buffer
- Very low amp glow and clean calibration frames
Cons
- Sensitive to USB cable length and shared mount hubs
- Bundled barrel power connector can be finicky to seat
- Some driver and buffering reports with NINA plate solving
- Cooling is slow to pull down to target temperature
The SV405CC is the one to buy when the budget is the deciding factor and you still want a back-illuminated sensor rather than an older front-illuminated one. Reviewers repeatedly describe it as the strongest cooled one-shot-colour value at the entry tier, and the reported results from Bortle 7 skies suggest the low noise is doing real work in bright conditions.
The sensor is a 4/3 inch IMX294 reading 4144 by 2822 at 4.63 micron pixels, with a published full well capacity of 63ke-. That full well figure is the number to pay attention to here, because it is the largest in this group and it means you can run longer sub-exposures before the brightest stars in frame start to saturate and bloat.
Output is 14-bit rather than 16-bit, which is the specification most often quoted against it. In practice the difference matters far less than spec forums suggest, because post-processing and dithering recover a lot of the visible gradation that people worry about.
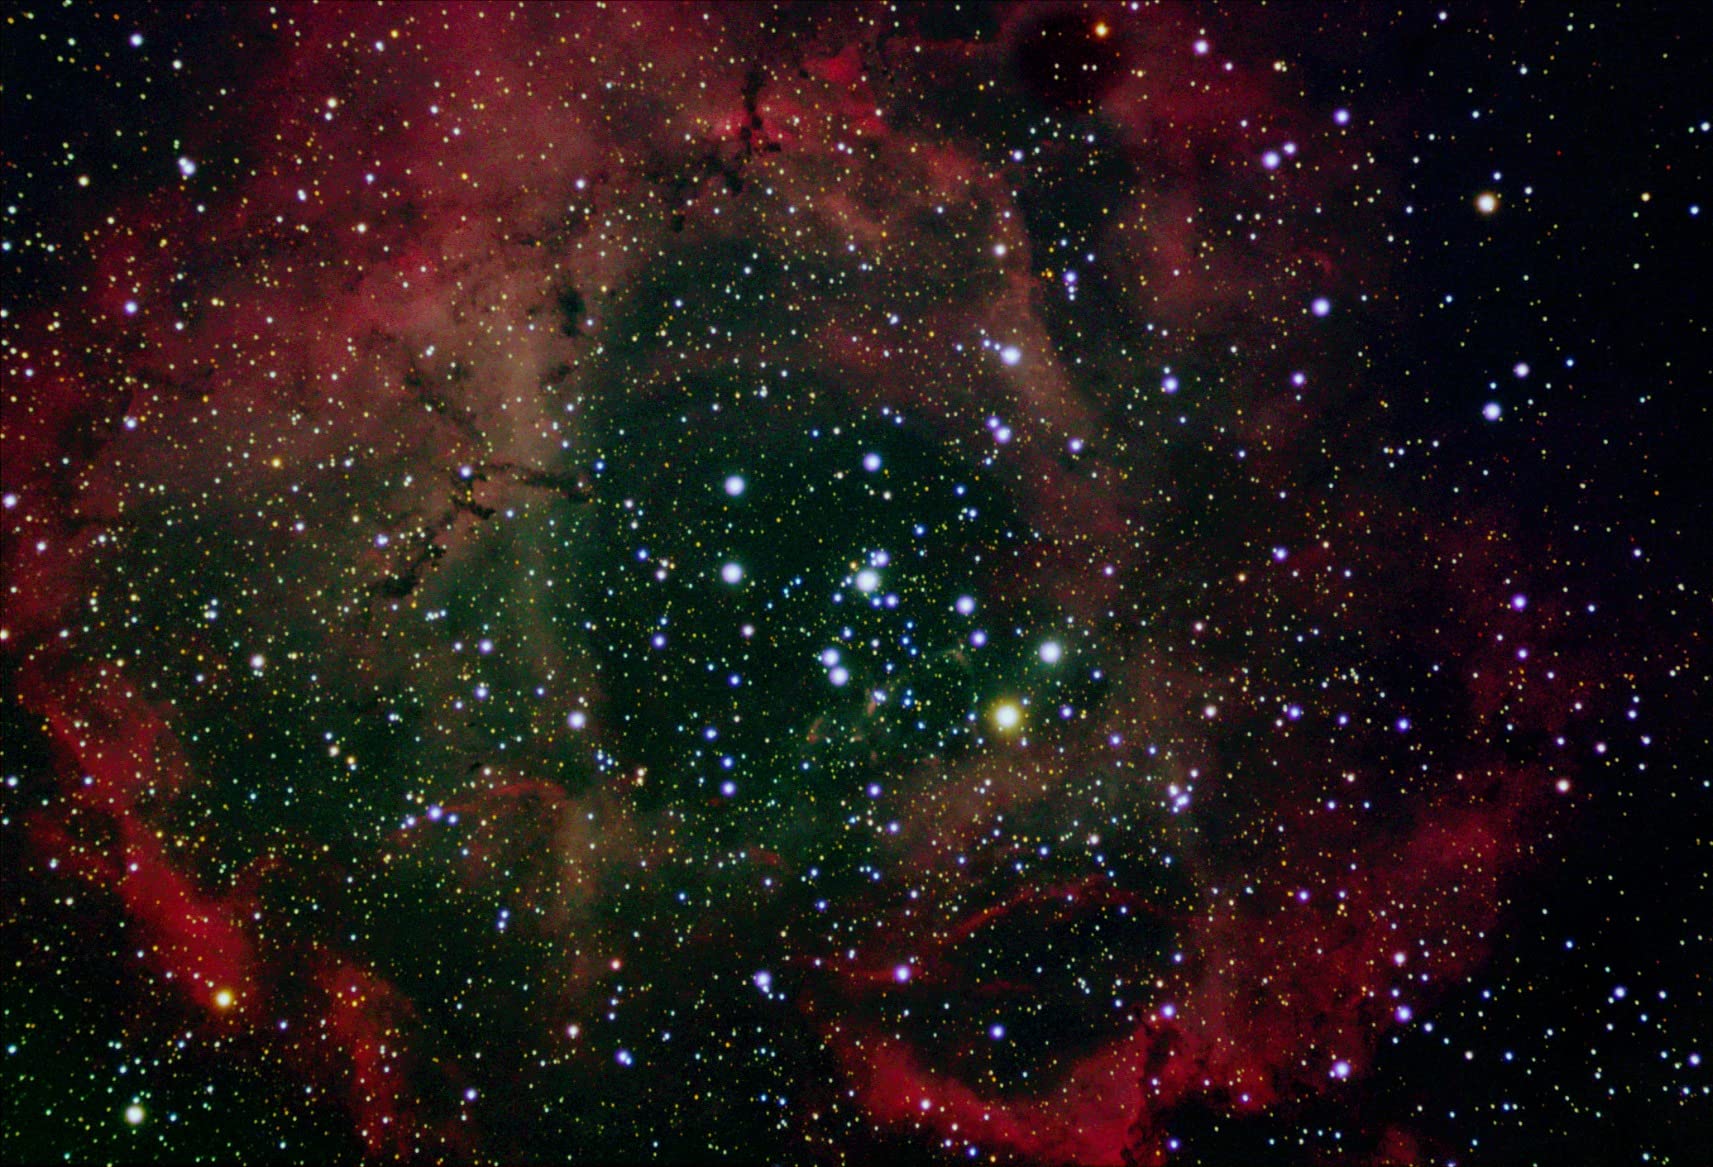
Cooling is a two-stage TEC rated at 30C below ambient, landing the sensor around -10C in a typical room. That is enough to suppress dark current for the multi-minute subs most people take, though owners note it is not the fastest cooler to pull down, so give it several minutes before you calibrate after a power cycle.
Data transfer runs over USB 3.0 at 5 Gbps for 19 fps in RAW8 or 16 fps in RAW16 at full 11.7MP resolution, backed by a 256MB DDRIII buffer. Smart HCG mode kicks in automatically at gain 120 and above, cutting read noise without giving up the dynamic range you gained in the first place.
Compatibility is broad. It runs on Windows, Linux, Mac OS, Chrome OS and Raspberry Pi through AstroDMx Capture, and the bundled ASCOM driver covers SharpCap, TheSkyX and other ASCOM platforms, so you are not locked into one acquisition program.
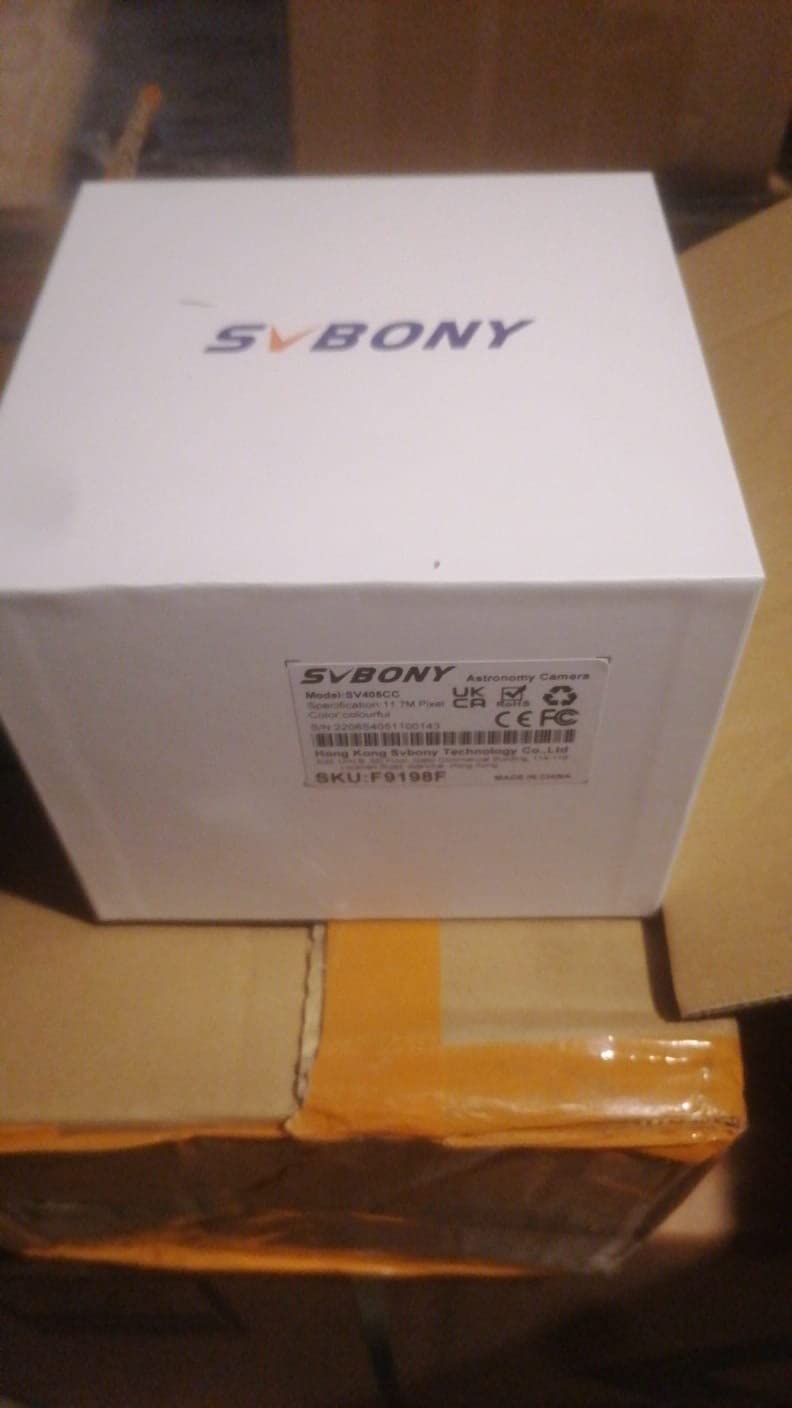
What to sort out before you capture
USB cable length is the most reported practical issue. Long or unshielded leads, and USB hubs shared with a mount, are the two things owners flag as causes of the camera dropping out mid-sequence. A short certified USB 3.0 cable directly to the computer or controller is the whole fix.
The bundled barrel power connector also gets called out as finicky to seat. Check the cooling power is genuinely reaching the camera, because a partially seated connector shows up as slow cooling rather than as an error, and slow cooling gets blamed on the camera.
Where it is the wrong choice
At 4.63 micron pixels this is the coarsest sensor in the group. On a long refractor that is a sensible sampling match, but on a short wide-field astrograph you will be undersampling badly and a reducer or a smaller-pixel camera will serve you better. Match it to a focal length between roughly 600mm and 1200mm for best results.
The cooling delta is also the smallest here. If your site regularly reaches summer daytime temperatures of 30C or more, the extra delta the other bodies carry will keep your darks cleaner than you can achieve with this one.
3. ZWO ASI2600MC Pro – The Biggest Sensor and the Highest Rating Here
ZWO ASI2600MC-Pro 26 Megapixel USB3.0 Cooled Color Astronomy Camera for Astrophotography
IMX571 APS-C sensor at 26MP
3.76 micron pixels
16-bit ADC for 14 stops
0e- readout noise
80% peak QE
Pros
- 26MP APS-C back-illuminated IMX571 resolves fine nebula and galaxy structure
- 16-bit ADC provides up to 14 stops of dynamic range
- Ultra-low 0e- readout noise and 80% peak quantum efficiency
- Zero amp glow design suits long stacked integrations
- Two year manufacturer warranty
Cons
- Requires an external 12V power supply for TEC cooling
- Low 3.5 fps frame rate suits still imaging rather than planetary video
The ASI2600MC Pro is the flagship of this group on paper, and all seven ratings on this listing are 5 stars. Treat that score with the usual caution when the review base is small, but the underlying sensor is well established and its headline numbers are the ones experienced imagers actually specify when they plan a rig.
Under the cover is a back-illuminated IMX571 APS-C crop sensor at 26 megapixels, with a 17.3 by 13mm active area. That is a meaningful jump in field of view from the 4/3 inch options: a large emission nebula fits with room to spare, and small galaxies no longer need aggressive cropping to fill the frame.
Read noise is listed at 0e-, which is the sensor’s high-conversion-gain behaviour rather than a claim that noise is literally absent. The practical reading is that at the higher gain settings the amplification noise drops out of your stacked data, which is what protects star colour and keeps bright cores from turning into white blobs with halos.
Peak quantum efficiency is 80%, and the 16-bit ADC delivers up to 14 stops of dynamic range. Combined with a zero amp glow design, that is the specification set that lets you run long subs on emission targets and stack the results without fighting a fixed pattern artefact in every frame.
Data transfer is USB 3.0 at 5 Gbps. Note the frame rate listed at 3.5 fps: this is a still deep-sky camera, not a planetary video camera. If your interest includes high frame rate lucky imaging of Jupiter, you want a different body entirely.
Cooling also needs an external 12V supply, which is not included. A two year manufacturer warranty comes with the body, which is a longer commitment from the manufacturer than most of the alternative brands in this category offer.
Why the IMX571 sensor keeps coming up
IMX571 is the sensor generation that changed expectations for one-shot-colour work, and forum discussion consistently reports high satisfaction with its low read noise and 16-bit data. The pattern in user reports is also consistent on pairings: smaller sensors win for wide-field speed and budget, larger ones win for sampling and resolution on small galaxies.
Buyers comparing this body against a 1 inch sensor usually conclude the APS-C part is worth it when the target is a compact galaxy or a nebula that fills the frame, and not worth the extra when the goal is a wide field of dozens of small objects at once.
Where it is the wrong choice
The frame rate rules out planetary and lunar high-frame-rate work, so a buyer who wants one camera for everything ends up buying twice. There is also no internal USB hub on this body, which means your guide camera and electronic focuser need their own hub or routing.
On a very fast astrograph, 3.76 micron pixels will oversample badly and waste resolution unless you use a reducer. Pair it with a refractor or longer focal length Newtonian instead, where the sampling lands where you want it.
4. ZWO ASI585MC Pro – The Fast Readout and the Cleanest Darks
ZWO ASI585MC Pro Cooled Color Astronomy Camera # ASI585MC-P
8.29MP back-illuminated sensor
47 fps at full resolution
TEC cooling 35C below ambient
0.9e- read noise in HCG
91% peak QE
Pros
- Zero amp glow implemented at the hardware level for clean darks at any gain
- 47 fps full-resolution readout over USB 3.0 with 512MB DDR3 cache
- 91% peak quantum efficiency and 47ke- full well capacity
- Two-stage TEC cooling more than 35C below ambient
- Suited to both deep-sky and solar
- lunar or planetary imaging
Cons
- Cooling delta drops as ambient temperature falls
- Requires a separate 12V power supply for the TEC cooler
- Smaller sensor area limits field of view on long focal lengths
The ASI585MC Pro is the newest design in this group and the only one that pairs deep-sky work with a genuinely fast readout, which makes it the odd one out in the best way. Its STARVIS 2 sensor brings a reported 91% peak quantum efficiency and a 47ke- full well capacity, nearly four times the previous generation the manufacturer compared it against.
Where it separates itself from everything else here is amp glow, handled at the hardware level rather than through a software setting. On a back-illuminated 2.9 micron pixel sensor with a 256MB-plus buffer, that means your darks come back clean at any gain or exposure length, which removes the nightly dark calibration chore that dominated the older bodies in this list.
Readout speed is 47 fps at the full 8.29 megapixel resolution in 10-bit high-speed mode over USB 3.0 at 5 Gb bandwidth, with a 512MB DDR3 cache doing the buffering. That is fast enough for solar, lunar and planetary work as well as deep sky, so it genuinely is a two-discipline body.
Cooling is a two-stage TEC rated at more than 35C below ambient, tested by the manufacturer at 30C ambient. Built-in HCG mode engages at gain 252 and drops read noise to as low as 0.9e-, which is the setting to use for faint broadband targets where you need every electron you can keep.
There is an integrated USB 2.0 hub on the body for an electronic filter wheel, guide camera or electronic focuser, and it comes in a smaller package than the larger bodies here. That size difference matters if your optical train is already close to the mount’s payload ceiling.
What the small sensor actually costs you
8.29 megapixels is a third of what the APS-C bodies here offer, and it is the reason this camera is not our top pick. On a long refractor you will be framing a small field, so large nebulae need mosaicking and small galaxies will need cropping that reduces the effective resolution anyway.
What you gain is a shorter, lighter body and faster readout, which is a real advantage if you are doing a lot of sampling and focusing with short exposures rather than long integrations.
Where it is the wrong choice
The cooling delta falls as ambient temperature drops, so the headline figure is measured at 30C ambient. In a genuinely warm climate that is still plenty, but if you image through a cold winter you are getting less than 35C of separation, and dark current creeps back up.
Only two ratings exist on this listing, so there is no long owner history behind it yet. That is the honest trade for buying the newest, most capable electronics in the group.
5. SVBONY SC571CC – An APS-C Sensor With the Power Hub Included
SVBONY SC571CC IMX571 APS-C Cooled Camera with SV241 Power Adapter USB Hub
IMX571 APS-C sensor at 26MP
3.76 micron pixels
Dual-stage TEC to 35C below ambient
Bundled SV241 power and USB hub
FITS output
Pros
- 26MP APS-C IMX571 delivers sharp stars and clean faint-nebula data
- Low dark current makes post-processing straightforward
- Bundled SV241 hub removes the need for a separate power and USB distribution box
- Compatible with the bundled ToupTek INDI driver out of the box
Cons
- Cooler is weaker than the specification implies at roughly -10C at room temperature
- -15C needs full cooling power and is likely of minor benefit
- No internal USB hub for accessory connections
The SC571CC takes the same IMX571 APS-C sensor as the ZWO flagship and pairs it with something the ZWO does not include: a full power distribution and USB hub in the box. For anyone building a first serious rig, that bundle removes one of the most annoying shopping tasks, which is working out where 12V comes from.
The sensor reads 26 megapixels across a 23.4 by 15.7mm area at 3.76 micron pixels, which puts it in the same field of view class as the ASI2600MC Pro. Specification is quoted as compatible with APO, Newtonian, RC and catadioptric scopes at medium to long focal lengths.
Cooling is a dual-stage TEC rated at 35C below ambient, with an all-metal heat dissipation design intended to keep the sensor stable through long exposures. Output is FITS with manual exposure control, which is the format every stacking program in this hobby reads.
The SV241 hub is the reason to look at this bundle twice. It has six DC outputs rated up to 10A each, two USB 3.1 ports, one USB 2.0 port, a Type-C port and a shared 5V 2.5A dew heater output, all running off a single 12V input that should not exceed 12V and 10A, with ESD protection and short-circuit filtering built in.
Control is through a bundled ToupTek INDI driver. INDI is a fine choice if you are already running it, but NINA, Sequence Generator Pro and the wider ASCOM ecosystem are the more common acquisition stack, so check your chosen software’s driver support before committing.
The cooling spec deserves a reality check
The stated 35C delta below ambient is a rating taken under ideal conditions. The single owner feedback on this listing reports achieving about -10C in a room-temperature environment, and judges that reaching -15C requires full cooling power for little practical gain.
That is not a dealbreaker, but it is the kind of number to verify yourself on arrival rather than assume. Set a target temperature, let it stabilise and take a dark frame, then judge from the data.
Where it is the wrong choice
There is no internal USB hub on the camera itself, so accessories rely on the bundled SV241 or an external hub. If you are not using that hub for something else, you are carrying a device you might otherwise skip.
With one rating on record there is no community history to lean on. Buyers who value a long, well documented support record should weigh the two year ZWO warranty against that thin track record.
6. SVBONY SV605CC Kit – The Complete Imaging and Guiding Bundle
SVBONY SV605CC Astronomical Deep Space Photography Kit
IMX533 1 inch square sensor
3008x3008 at 80% peak QE
Guide camera and 60mm guide scope included
ST4 guide interface
Pros
- IMX533 one-inch square colour sensor delivers 3008x3008 at 80% quantum efficiency
- Square format suits deep-sky framing and meteor monitoring
- Bundled guide camera and 60mm guide scope form a complete package
- ST4 interface works with PHD2
- MDL
- NINA and SkyX
Cons
- One-inch sensor area is smaller than 4/3 inch or APS-C alternatives for wide-field work
- Guide camera uses USB 2.0 rather than a faster interface
The SV605CC kit is the only product here that solves the guiding problem as well as the imaging one. You get a cooled imaging camera, a matching guide camera and a 60mm guide scope with a helical focuser in one package, which means a beginner can reach a working guided setup without also researching a second purchase.
The imaging sensor is an IMX533, a one-inch square colour sensor producing a 3008 by 3008 frame at 80% quantum efficiency. The square format is unusual and genuinely useful for deep-sky framing, because it matches the shape of many targets and wastes fewer pixels on empty corners.
The kit is described as suitable for deep-space photography, panoramic astronomy, meteor monitoring and lucky imaging. The meteor and lucky imaging uses are not marketing filler: the square sensor and the fast readout suit short high-frame-rate sequences better than most long-exposure bodies.
Guiding is handled by the SV905C, a compact 1.23 megapixel one third inch colour CMOS camera at 1280 by 960 with 3.75 micron pixels, 80% peak quantum efficiency and low read noise. It outputs over USB 2.0 and offers an ST4 guide star interface compatible with PHD2, MDL, NINA and TheSkyX.
Why the square sensor changes your framing
Rectangular sensors force a compromise: you frame a wide band and crop the rest, or fill the short axis and lose the sides. A square frame on an IMX533 gives the full sensor width in both directions, which makes mosaicking a large nebula a simpler arithmetic problem than it is with the bodies in this list.
The 60mm guide scope with a helical focuser gives you a wide, forgiving guide field. That matters more than aperture here, because finding and holding a guide star reliably is what determines whether a session produces data or produces guiding errors.
Where it is the wrong choice
One-inch is the smallest sensor area in this group. On a wide-field astrograph you will be undersampling heavily, and for large nebula work you will be mosaicking where a 4/3 inch or APS-C body would frame it in one shot.
The guide camera on USB 2.0 is not a practical problem at 1.23 megapixels, but it does add a second cable and a second port to manage. Anyone who wants the simplest possible single-cable rig should look at a body with a built-in guide sensor instead.
Why Every Camera Here Is One-Shot Colour
Because none of the six uses a monochrome sensor, you will never need a filter wheel for any of them. A Bayer RGGB array records all three colour channels in a single exposure, so you shoot one frame and get luminance plus colour from the same photons.
The common claim that mono is twice as fast as OSC is not accurate in general. The real ratio depends on how much of your schedule is luminance. Modelled schedules give roughly 3.00 to 1 for a luminance-only plan, 2.45 to 1 for an 8:1:1:1 LRGB plan, 2.14 to 1 for 4:1:1:1, and 1.50 to 1 for equal RGB. The further your schedule moves toward pure colour, the smaller the mono advantage becomes.
The filter wheel complexity is the single most cited reason people abandon mono, and it is a real burden rather than a learning curve you push through. Every filter needs its own focus check, its own calibration frames and its own flats, and all of that has to be redone whenever the train is disturbed.
Forum discussion reflects that maths in practice. Recurring accounts on r/AskAstrophotography describe people moving back from mono to colour not because the colour data was better, but because the simpler workflow produced more usable data and therefore longer total integrations, which is what actually determines finished image quality.
The genuine argument for mono is narrowband. If you are working emission nebulae from a light-polluted suburban or city site, a mono body plus narrowband filters is described repeatedly as the highest quality path there is, because you can reject the sky background line entirely. A colour body with a dual-band filter is the pragmatic alternative, and it gets you most of the way without the wheel.
If you are still deciding between formats, our broader visual astronomy equipment guides cover the optical side of matching a sensor to an optical train.
Match the Sensor to Your Telescope With Pixel Scale
Pixel scale tells you how much sky each pixel covers, and it is the single calculation that stops you buying a sensor you cannot fill or one that oversamples your telescope into wasted resolution.
The formula is pixel scale in arcseconds per pixel equals 206.265 multiplied by the pixel size in microns, divided by the focal length in millimetres. Take the pixel size straight from the spec above and plug in your own focal length.
Worked examples using the 2.4 micron pixel in the ASI183MC Pro: at 400mm focal length you get about 1.24 arcsec per pixel, at 800mm about 0.62, and at 1000mm about 0.49. Under a typical 2 arcsec seeing sky, 1 to 2 arcsec per pixel is the range most deep-sky targets want.
With the 4.63 micron pixel in the SV405CC the same formula gives about 2.39 arcsec per pixel at 400mm, 1.19 at 800mm and 0.96 at 1000mm. That is the clearest demonstration of why pixel size matters more than sensor size alone: the same focal length lands in completely different sampling regimes.
With the 3.76 micron APS-C pixels in the ASI2600MC Pro and SC571CC you get about 1.94 arcsec per pixel at 400mm, 0.97 at 800mm and 0.77 at 1000mm. That combination is why these two fit medium to long refractors so naturally.
If your computed number lands well below 1 arcsec per pixel, you are oversampling and paying for resolution the sky and your optics will never deliver. The fix is a reducer, not a bigger sensor.
Cooling, Gain and Offset: What the Numbers Actually Mean
Delta below ambient is the temperature drop the TEC achieves relative to the surrounding air, not an absolute sensor temperature. That distinction matters: a camera rated 35C below ambient running in a 25C room sits at -10C, and the same camera in a 5C room sits at -30C with the same rating but less useful separation from the electronics.
This is the warm-climate complaint forum users raise most often. The cameras here are rated between 30C and 45C below ambient, and the two bodies quoting deeper deltas have more headroom on a hot summer night at a site that never drops below 20C.
Gain and offset are the two calibration controls that set where your data sits. Offset places the pedestal, and getting it right in the first two or three exposures is what stops your signal from clipping or sitting on the noise floor. Most acquisition software walks you through this automatically.
High conversion gain is the modern alternative to chasing zero read noise. The ASI585MC Pro engages HCG at gain 252 for read noise as low as 0.9e-, and the SV405CC switches into Smart HCG at gain 120 and above. For faint broadband targets, running at the HCG point is usually the right starting position rather than the lowest possible gain.
Bit depth is worth one note. The ASI2600MC Pro uses a 16-bit ADC for up to 14 stops of dynamic range, while the SV405CC outputs 14 bits. The difference is real but modest, and dithering plus good calibration frames recover most of the gradation people expect to lose.
Amp glow deserves its own habit. On bodies like the ASI183MC Pro it appears as a corner halo that nightly darks remove. On the ASI585MC Pro it is eliminated at the hardware level, which is the cleanest solution available in this group.
What a Rig Really Costs Beyond the Camera
The camera is the part you can price in a minute. The rest of the rig is where people get surprised, and the surprise is worst for mono buyers because they discover it late.
A one-shot-colour rig like any of the six here needs the camera, cooling power, a USB cable, a guide camera and a guide scope. Add filters only if you plan narrowband work, and add them as a set rather than one at a time.
A mono rig needs everything above plus an electronic filter wheel and a filter set. Reported costs for a mono setup regularly come in above the camera itself, which is exactly why the mono-versus-colour decision is usually made on total budget rather than image theory.
There is a hidden time cost too. A filter wheel means per-filter focus checks, per-filter calibration frames and a stacking session for each band, so a mono plan quietly multiplies the number of evenings your setup has to be recalibrated.
Before deciding on any of this, it is worth checking how long you expect to spend outside. Observers who mostly view rather than image can start with simpler gear like our beginner astronomy picks and add a cooled camera when they are ready for long integrations.
First Night Checklist With a New Cooled Camera
Run a dark frame before anything else. Set the target sensor temperature, let the TEC stabilise, and capture a dark at the same exposure and gain you plan to use. If it is not black, the camera is still cooling or the power is not fully reaching it.
Confirm the cooling target is realistic for your ambient temperature before you set an ambitious figure. Take flats against a uniform white surface at the same optical train, including any reducer or filter you will use.
Check the USB topology. A short certified cable directly to the computer, with accessories on a separate hub, solves most of the dropout complaints associated with these bodies. Avoid sharing a hub with the mount.
Enable dithering in your capture software. Modern CMOS workflows favour many shorter subs with dithering over the long single exposures the old 400 rule habit suggested, and dithering is what makes that stacking work.
Look at a single raw frame at 100 percent before you commit to a long sequence. Dead pixels, a cloudy lens, a loose adapter and a focuser that has moved under the weight of the camera all show up immediately at full resolution and cost you an entire night if you miss them.
Frequently Asked Questions
Which cooled astro photography camera is best?
For most people the ZWO ASI183MC Pro is the best overall choice, because its 20.1MP 4/3 inch back-illuminated sensor, 2.4 micron pixels and cooling rated 40C to 45C below ambient suit most optical trains, and it has the largest owner base of any camera we reviewed. If you have a very long refractor and want the largest field available, the ZWO ASI2600MC Pro is the stronger pick. If your budget is the constraint, the SVBONY SV405CC gives you a back-illuminated sensor and a 63ke- full well figure.
Are ZWO cameras good?
Yes, for deep sky work ZWO bodies are among the most widely used cooled cameras in the hobby, and four of the six we reviewed are ZWO models. The reputation is deserved on the sensor side: back-illuminated parts, zero amp glow designs and built-in HCG modes are now standard. The fair criticisms are that some models need a separate 12V cooling supply, that the naming convention is genuinely confusing, and that the newest bodies have very thin owner histories behind them.
Do I need a cooled camera for deep sky astrophotography?
For long sub-exposures of faint targets, yes. Dark current rises sharply as the sensor warms, so an uncooled or DSLR sensor accumulates its own noise throughout every exposure and stacking cannot remove it cleanly. Cooling that noise out is what makes multi-minute exposures usable. Short exposures on bright targets are the exception, where the difference matters much less, but that is not the regime deep sky imaging lives in.
Do I need a filter wheel for a mono camera?
Yes, a monochrome camera cannot record colour without external filters, so you need an electronic filter wheel and a filter set. You also need per-filter focus checks, per-filter calibration frames and a separate stacking session for each band. This is the single most cited reason imagers choose one-shot colour instead, and it is a fair reason. Every camera in our roundup is one-shot colour, so none of them requires a filter wheel for broadband work.
What is the best gain setting for the ASI2600MC Pro?
There is no single correct number, because the right gain depends on your target, your sky background and your exposure length. Start by letting your acquisition software auto-calibrate offset at roughly 100 ADU above the background, then choose the lowest gain that still gives clean data for the exposure you want. For faint broadband targets, run a high conversion gain point rather than the lowest gain available, because it suppresses read noise and protects star colour through the stack.
What is the 400 rule in astrophotography?
The 400 rule says to avoid exposures longer than 400 divided by your pixel scale in arcseconds per pixel, on the theory that longer subs let stars trail and add thermal noise. Modern cooled CMOS workflows largely moved past it, because these sensors read out cleanly and stacking many shorter frames with dithering produces better results than a few long ones. Treat it as a habit from the DSLR era rather than a rule you need to obey today.
Final Verdict
The ZWO ASI183MC Pro is our pick for the best cooled astronomy cameras for deep sky imaging in 2026, and it wins on evidence rather than on a headline specification. Thirty-nine owner ratings are not many, but they are the most we found on any camera here, and they describe consistent behaviour across very different telescopes. Buy that one and you are choosing a camera whose strengths and quirks are both well documented.
Choose differently only for a specific reason. The SVBONY SV405CC is the entry pick, with the largest published full well capacity in the group and a sensor size that suits mid-range focal lengths. The ZWO ASI2600MC Pro is the one for the widest field of view and the highest rating. The ZWO ASI585MC Pro covers the most imaging disciplines, with the fastest readout and hardware-level amp glow elimination. The SVBONY SC571CC bundles the power hub you would otherwise buy separately. And the SVBONY SV605CC kit is the shortest route to a guided setup, since the guide camera and guide scope come with it.
Whichever one you settle on, match the pixel pitch to your focal length before you commit. That single check prevents the most common and most expensive mistake in this hobby.